

As a homeowner, you are bound to need a new AC installation at some point because AC units have somewhat short lifespans. Most modern AC units are expected to last between 15 to 20 years, depending on how well you maintain them. The older HVAC units only last bout 10 to 12 years. If you are looking to replace your older AC, it’s vital that you get the installation process for your new unit right for it to last the expected lifespan. Here is a look at the general process.
1. Planning for an HVAC Unit Installation
The process of installing a new AC unit starts with planning the installation. Modern HVAC units are 20% to 50% larger in all dimensions than older AC units. This provides them with more room to have large coils that will make them more efficient.
However, this also means that if you are doing a replacement, it’s likely that the new AC unit won’t fit where the old one currently is. Therefore, you might have to move the location of your new AC unit, which might mean that your ductwork needs to be modified. This may take the AC unit further from the utility meter and bring about more additional costs. Fortunately, modern AC units run much more quietly and are more efficient, two benefits which you will soon find more than worthwhile. Heat pumps are also low-energy alternatives to air conditioning and double as heat sources. Many professionals may advise whether this is a preferable long-term replacement option.
2. Getting an Experienced Professional AC Installation Team
Accomplished AC technicians will review your existing AC installation and your new installation needs and will provide you with an estimate for the cost. This will also minimize the chances that mistakes will happen during the installation process. Check for credentials and ask for references when choosing the right company. It’s worthwhile to ask for bids from multiple companies and see what each of them includes in the bid, to make sure that the bottom line reflects all of the same jobs and that there are no surprise costs with the lowest bid.
3. Removing the Current AC Unit
The AC technician will start with safety procedures like turning off the gas supply and the electrical circuit connected to your old AC unit before putting down floor protection. The process of removing your current AC unit will commence with safely getting rid of its refrigerant. The EPA outlaws the release of the refrigerant into the atmosphere due to its detrimental pollution effect; therefore, a specialized recovery machine will be used. Check to ensure that the AC technician handling the refrigerant and the specialized recovery machine has EPA certification.
Once done with the refrigerant, competent AC technicians will turn off the circuit breakers and will remove the disconnect box and its whip. If your old HVAC unit didn’t have it, you would have to install a new disconnect box and whip with your new AC. Now your old condenser unit will be removed.
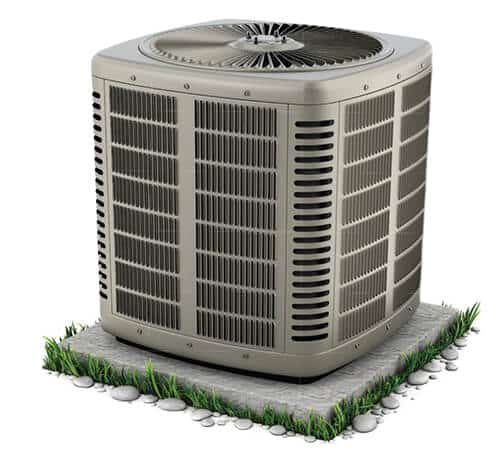
4. Preparing the Area for Your Condenser Unit Installation
Whether you are using a new spot or the exact location for your new condenser unit installation, the area will need to be prepared. A reputable AC installation and services company will start by fitting a new base and pad for your new condenser. There might be some digging and gravel application for leveling the ground.
We recommend that you have a composite pad for your outdoor unit to sit on over a concrete pad. This is because a concrete pad will crack and shift sooner or later, which might mean another replacement. This is because, in most cases, once the AC condenser is installed and connected, it can’t be lifted or moved safely without damage.
In contrast, installing your outdoor AC unit on a purposely designed composite pad can last a lifetime. The material would absorb the machine’s vibrations, reducing shaking and noise. Additionally, a composite pad can allow for minor leveling adjustments in the future.
5. Removing the Old Indoor Evaporator Coils and Copper Refrigerant Lines
Now you will have to deal with the remaining half of your old AC unit. Commence by removing the current indoor evaporator coil, which is above the furnace and is connected to the refrigerant lines on its other end. Your old HVAC unit can have either a cased or uncased evaporator coil that has to be disconnected from the sheet metal plenum.
Removing the copper refrigerant lines will involve undoing the straps holding them to the bottom of the floor joists. The entirety of the existing refrigerant lines has to be removed. If this is not possible, a new location for installing the new refrigerant lines will be chosen.
6. Installing New Indoor Evaporator Coils and Refrigerant Lines
At McGowan's Heating & Air Conditioning, we recommend that you have cased evaporator coils for your new AC installation because it comes pre-cased from the manufacturer and ready to install, unlike the uncased option. The new evaporator coil is then connected to the existing sheet metal plenum. Our competent AC technicians will also refer to the manufacturer’s guide during this installation process.
The new copper refrigerant lines should be installed with as few bends as possible and be secured every 4 to 6 feet to reach the service valves of the new condenser unit. Request that the copper lines are protected to prevent galvanic corrosion.
7. Setting Your New AC Condenser Unit
Before setting your new HVAC condenser unit on the pad, a top-class AC installation and services company will thoroughly inspect it for any damage. Once placed on the pad, the new refrigeration lines are connected to its service valves, and the connection is brazed to provide a total seal.
8. Placing the Filter Dryer
A filter dryer is responsible for absorbing moisture and providing physical filtration. Your new condenser unit likely came with a liquid line filter dryer that our AC technicians will install near the TVX (expansion valve) around the indoor coil. After installation, it has to be connected to the new refrigerant system.
9. Installing the New Wiring
Start by installing the new disconnect box and whip; this can be a fused or non-fused option. We recommend a fused-disconnect box because it offers overcurrent protection to your new HVAC system. Your new AC unit will utilize low-voltage wiring to send signals from the furnace, condenser, and thermostat to enable heating and cooling. On the other hand, high-voltage wiring is what powers the different components of the HVAC system.
Once the wiring is done, your new AC system is ready for use. Reputable AC technicians will conduct some test runs to make sure everything is working well and will offer a warranty for the services provided.
Why Choose McGowan's Heating & Air Conditioning
At McGowan's Heating & Air Conditioning, we are the best AC service providers to handle your new AC unit installation as a resident of Northeast Florida or Daytona Beach. This is because we offer a stress-free AC installation and maintenance program and a more robust premium maintenance plan. Additionally, we undertake new home construction; therefore, you can rely on us to handle everything with your new home without worrying about changing contractors.
Moreover, at McGowan's Heating & Air Conditioning, we have a trusted warranty program to back up the quality services we offer and provide our clients with peace of mind. We are also the trendsetters in this region when it comes to financing options. Call us, and we will gladly help you with air conditioning, heating, new home build, and any other services you need.

